

.jpg)
Continuous performance testing (CPT) involves running performance tests continuously throughout the software development lifecycle (SDLC), from the early stages of coding to deployment and beyond. It ensures that performance is assessed and monitored consistently as the software evolves.
Unlike traditional performance testing, which is typically done at specific milestones in the development lifecycle, continuous performance testing is an ongoing process integrated into the development and deployment pipeline.
CPT offers several benefits, including preventing performance-related outages, improving the user experience at scale, ensuring service-level agreements (SLAs) are met, and guaranteeing your app's performance quality is maintained over time.
In this article, you'll learn more about performance testing, how it benefits developers, and the challenges faced when implementing it in Kubernetes. You'll also learn how to implement continuous performance testing in a Kubernetes app using Apache Bench, a performance testing tool for HTTP servers, and Garden, a tool for automating Kubernetes development and testing.
What is continuous performance testing?
Continuous performance testing is an approach that involves testing your app's performance throughout the entire software development lifecycle (SDLC). It aims to catch performance issues early in development and ensures your app performs as expected, even under pressure.
With CPT, you get real-time feedback on the performance of your system, enabling you to make informed decisions about optimizations and improvements. It helps uncover performance regressions and provides insights into the impact of code changes on the overall system performance.
Continuously running performance tests on application code and infrastructure provides insight into the behavior and performance of each component as development progresses. Using a continuous performance testing model can have several benefits, including the following:
- Prevents performance-related outages. Catching performance issues early on means fewer outages down the line. High-traffic load tests and resource-intensive stress tests can identify bottlenecks.
- Improves user experience at scale. Continuous performance testing allows developers to identify and address potential performance issues as the app scales, maintaining an optimal user experience.
- Ensures SLAs are met. Continuously monitoring your application's performance against SLAs means you get a notification when SLA violations occur.
- Guarantees performance quality is maintained over time. Continuous performance testing can provide insight into performance degradation over time, so that you can ensure your app performs at a high level.
Implementing continuous performance testing for Kubernetes-based apps
While implementing continuous performance testing has numerous benefits, it also has some challenges. In general, it's hard to perform real-world performance tests in development systems since they don't have the same resources available that production environments do.
During implementation, you'll often face the following issues:
- Automating every test is hard. Writing automated test cases for a complex Kubernetes app with different use cases and edge cases is difficult. Kubernetes applications typically consist of several microservices, each with its performance characteristics and dependencies. This complexity makes it difficult to automate every test, especially when testing for specific scenarios, such as traffic spikes, high availability, and failover.
- Finding the right tool is difficult. Although many load testing tools exist for Kubernetes, including Apache Bench, k6, and Locust, finding a single tool that satisfies all your performance testing takes time since each tool has its own strengths and weaknesses.
- Feedback loops are generally slow. Traditionally, developers perform unit tests locally and commit the code to repositories where continuous integration (CI) environments perform integration tests. However, inconsistencies between production and development environments can lead to unpredictable errors in production, causing a delay in collecting feedback. A lengthy feedback loop can hinder the implementation of CPT for complex Kubernetes applications, making it difficult to identify and resolve potential performance issues.
- Changing development workflows too many times can be counterproductive. Frequently changing development workflows can be a time-consuming and resource-intensive task. Every modification necessitates retraining team members, updating documentation, and reconfiguring development tools, taking attention away from actual development work. When it comes to implementing CPT in a Kubernetes application, these changes can make the implementation even harder. Implementing continuous performance testing requires coordination and collaboration among development, testing, and operations teams. If the development workflow changes often, ensuring everyone is on the same page and follows the same processes is challenging and can significantly delay the CPT implementation process.
- Decoupling tests from builds is tough. Separating testing code from build code allows tests to be run independently and earlier in the development process. However, this can be difficult because you have to take into account dependency management, configuration management, and code organization. Since testing code often relies on the same libraries and packages as the application code, it can be challenging to ensure the correct versions are used in both cases. Similarly, managing configuration files can be tricky since different configurations may be required for testing versus production environments.
In addition to these issues, Kubernetes implements role-based access control (RBAC) to manage access to resources within the cluster. This can make it challenging to set up and run tests that require access to your Kubernetes resources (*ie* pods, services, or config maps), which can be difficult if the appropriate permissions are not granted. However, to gain flexibility and avoid conflicts with the production environment, you can use a separate Kubernetes cluster for CI testing.
How to implement continuous performance testing in a Kubernetes app using Apache Bench and Garden
To implement CPT in a Kuberenetes-based application, you need to create a simple Node.js server that returns a <span class="p-color-bg">Hello World</span> string as the response. Then you'll use Garden to build, deploy, and test the app in your local Kubernetes cluster. This guide uses kind, a Docker-based Kubernetes distribution. However, you can use any other local Kubernetes distribution, such as minikube or K3s, if you prefer.
After testing the app, you'll use Apache Bench. Apache Bench makes it easy to simulate a load on your HTTP server.
All the code for this tutorial is available in this GitHub repo.
Create a Kubernetes resource for testing
To start, you need to set up a simple Node.js server that you'll use to build and deploy to your local cluster using Garden. Create an <span class="p-color-bg">app</span> folder in your project directory, followed by <span class="p-color-bg">npm init</span> to initialize a Node.js project.
Then create an <span class="p-color-bg">index.js</span> file to hold your server code inside the app directory and populate it with the following code:
Save and close this file.
Next, create the Dockerfile that Garden will use to containerize the app and deploy it to your cluster. Create the app/Dockerfile and put the following code into it:
Set up a Kubernetes cluster to deploy the application
After creating the Dockerfile, you need to set up a Kubernetes cluster so that Garden can deploy your Node.js server into it. As previously stated, you'll be using a local kind cluster for this purpose. You can install kind on your system following their official docs.
Once kind is installed, you can create the local cluster. It's important to note that you have to create your kind cluster with extra port mappings so Garden can run the ingress controller there. In order to do this, you need to create a <span class="p-color-bg">kind.config</span> file in the root of your project directory:
Now, you can create the Kubernetes cluster by running the following command in your terminal:
Once the cluster is created, you need to set up Garden to deploy the application to this cluster.
Set up a Garden pipeline for automating the build and deploy steps
To set up the Garden pipeline, you need to install the Garden binary following the official documentation. If you're on Linux, you can use the following installation script:
Make sure the installation works by viewing the Garden version information:
Now that Garden is installed, you need to set it up to monitor your Kubernetes app, then build and deploy it to the local Kubernetes cluster. To do that, you need to create a Garden project using the Garden CLI. A Garden project is a logical grouping of one or more services and represents a specific application or microservice architecture that you want to build, test, and deploy.
This command generates a new project config file called <span class="p-color-bg">project.garden.yml</span>. This file contains comments that point out each use case and configuration. However, to keep things simple, use the following project configuration instead:
This project config file specifies the default environment for your Garden project as local and sets up the hostname to <span class="p-color-bg">garden-demo.127.0.0.1.nip.io</span>. It also instructs Garden to use the <span class="p-color-bg">local-kubernetes</span> provider. Make sure you save this to a file called <span class="p-color-bg">project.garden.yml</span>.
Next, set up a Garden module as part of your pipeline. Create the <span class="p-color-bg">app/garden.yml</span> file and populate it with the following code snippet:
This module creates a container for your app and sets up a <span class="p-color-bg">backend</span> service. You'll use this backend service to access your application.
Before you can deploy the Kubernetes application via Garden, you need to initialize a git repository by running the following code in your project root:
Then run the following <span class="p-color-bg">garden deploy</span> command to deploy your app. Here, you're using the <span class="p-color-bg">-w</span> flag to enable watch mode:
Garden will spin up a new environment called <span class="p-color-bg">garden deploy</span>, as defined in your <span class="p-color-bg">project.garden.yml</span> file. It then creates the <span class="p-color-bg">demo-test</span> namespace in the Kubernetes cluster and deploys your HTTP server. You can view the Garden dashboard by copying the link from your terminal and pasting it into a web browser:
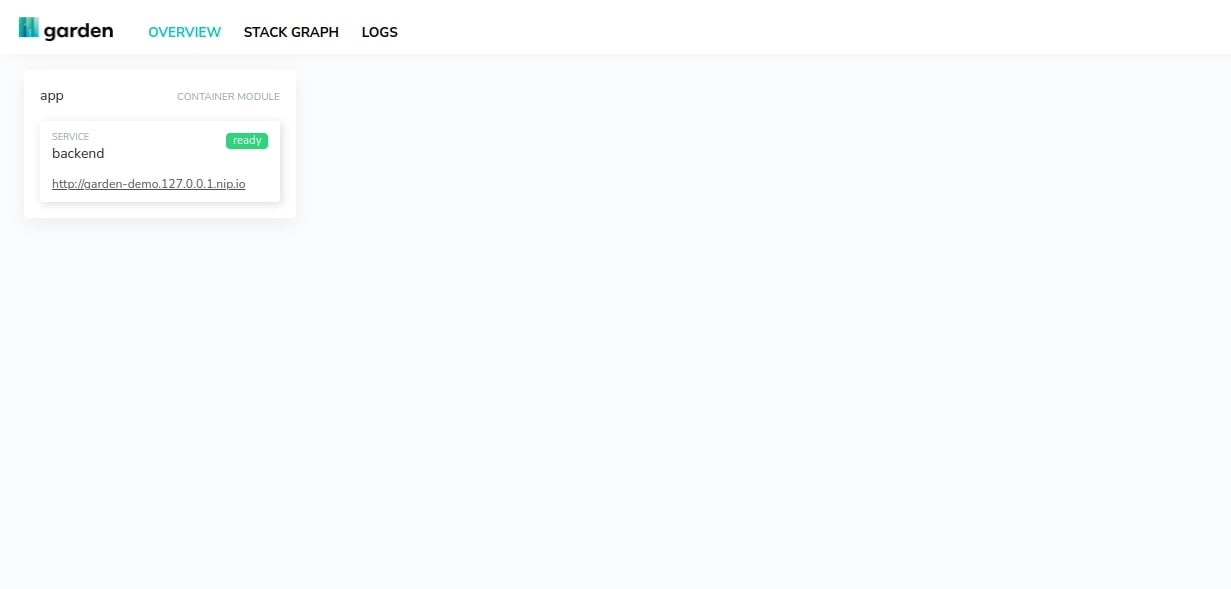
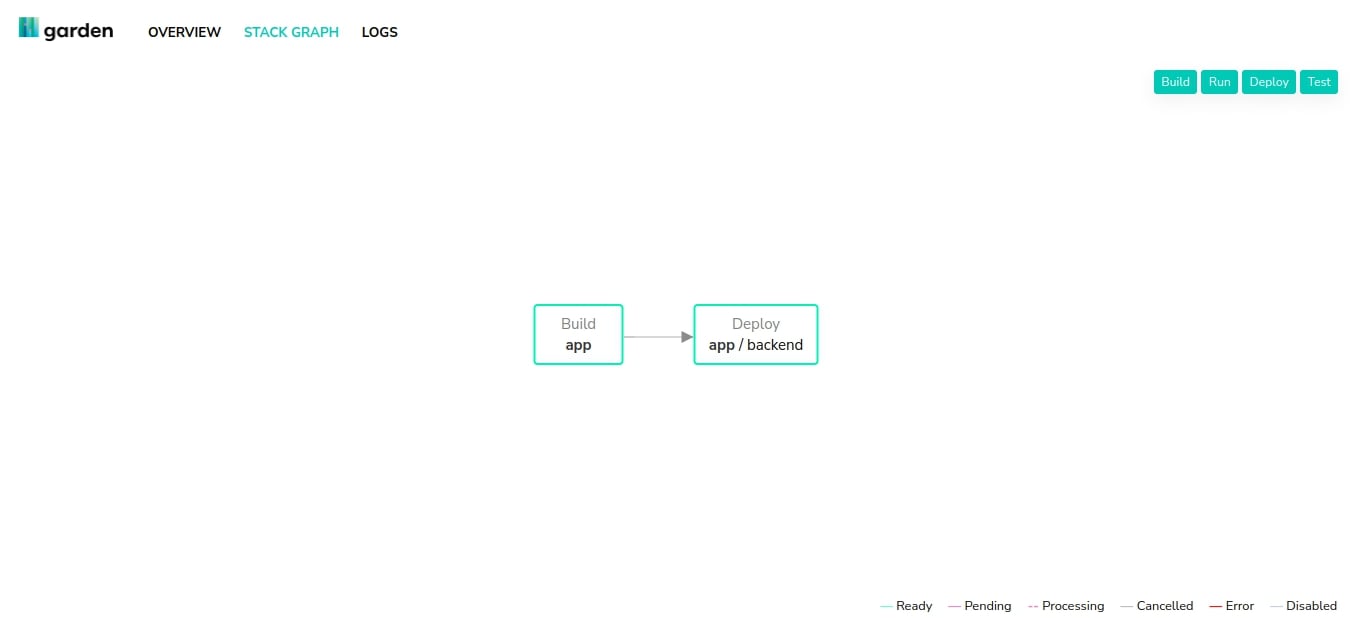
The dashboard provides a clear view of different Garden modules and services. You only have a single module of the type container called <span class="p-color-bg">app</span>. You can click the **STACK GRAPH** to see how the components work together. Here, you can see that Garden built the app module and then deployed your <span class="p-color-bg">app/backend</span> service:
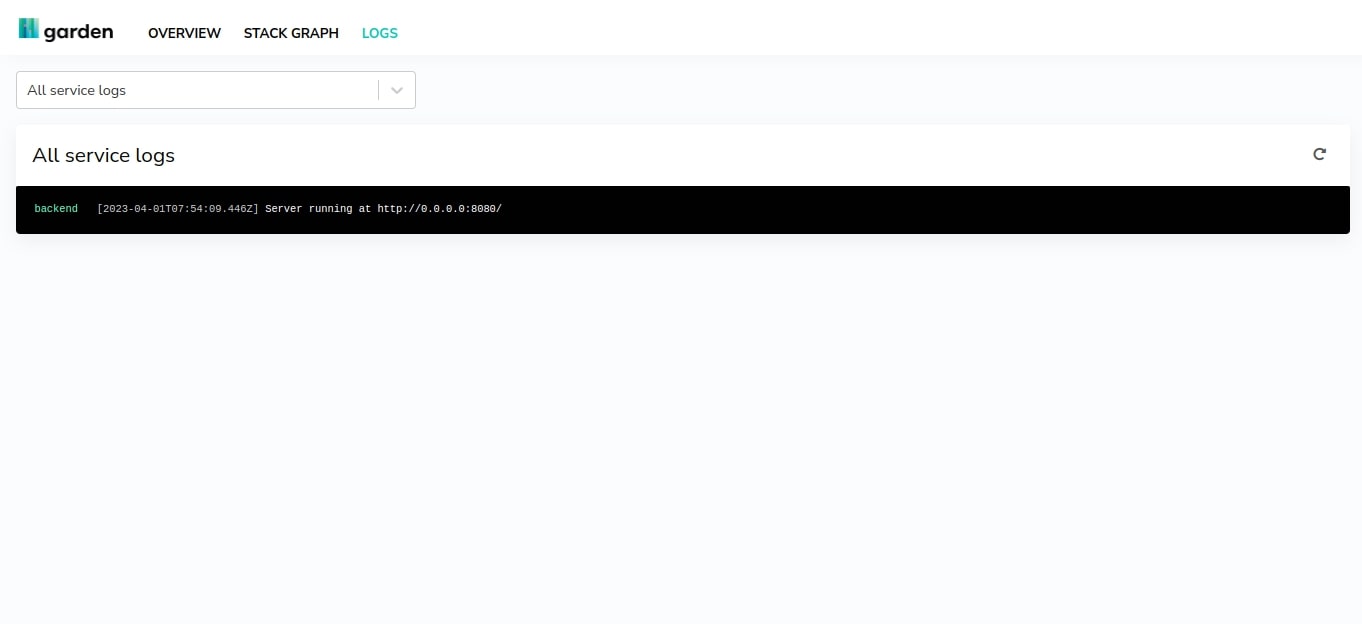
You can view the log generated by your Node.js server by clicking **LOGS** to display the console log emitted from your server:
Add Apache Bench to the Garden pipeline
Now that you have a basic service running in our Kubernetes cluster, you need to load test it via the Garden pipeline. In this instance, Apache Bench has been chosen as the load testing tool because it's lightweight and can benchmark HTTP servers based on load.
For example, you can use it to test your backend service with the following command:
As you can see, Apache Bench makes it easy to load test simple servers. This command sends 1,000 web requests with a concurrency level of 50, meaning 50 requests per second to the backend service. You can quickly ramp up the number of requests to simulate a high load on your server.
To add this load testing tool to your Garden pipeline, you need to create a new directory called <span class="p-color-bg">load-test</span> in the project root and create a <span class="p-color-bg">garden.yml</span> file inside that directory. Copy the following snippet to that file to add <span class="p-color-bg">ab</span> to your Garden pipeline:
Here, you've defined another Garden container module that spins up a new container and runs the performance testing tool. Apache Bench can access the <span class="p-color-bg">backend</span> service of the app container since Garden modules can access each other's services.
Now, you'll define a <span class="p-color-bg">Dockerfile</span> for <span class="p-color-bg">ab</span> inside the <span class="p-color-bg">load-test</span> directory, which Garden will use to create your load testing container. Create an empty Dockerfile and paste the following line into it:
Then run <span class="p-color-bg">garden deploy</span> again to see if <span class="p-color-bg">ab</span> performs the load test successfully on the <span class="p-color-bg">app/backend</span>:
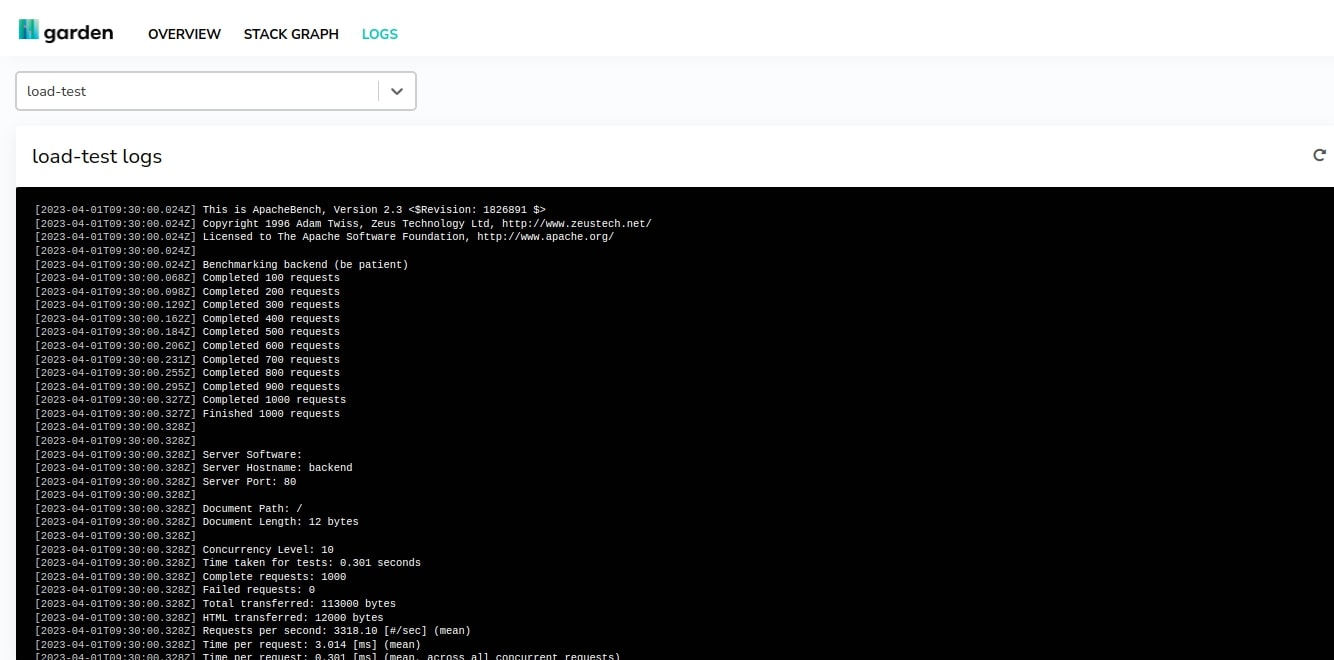
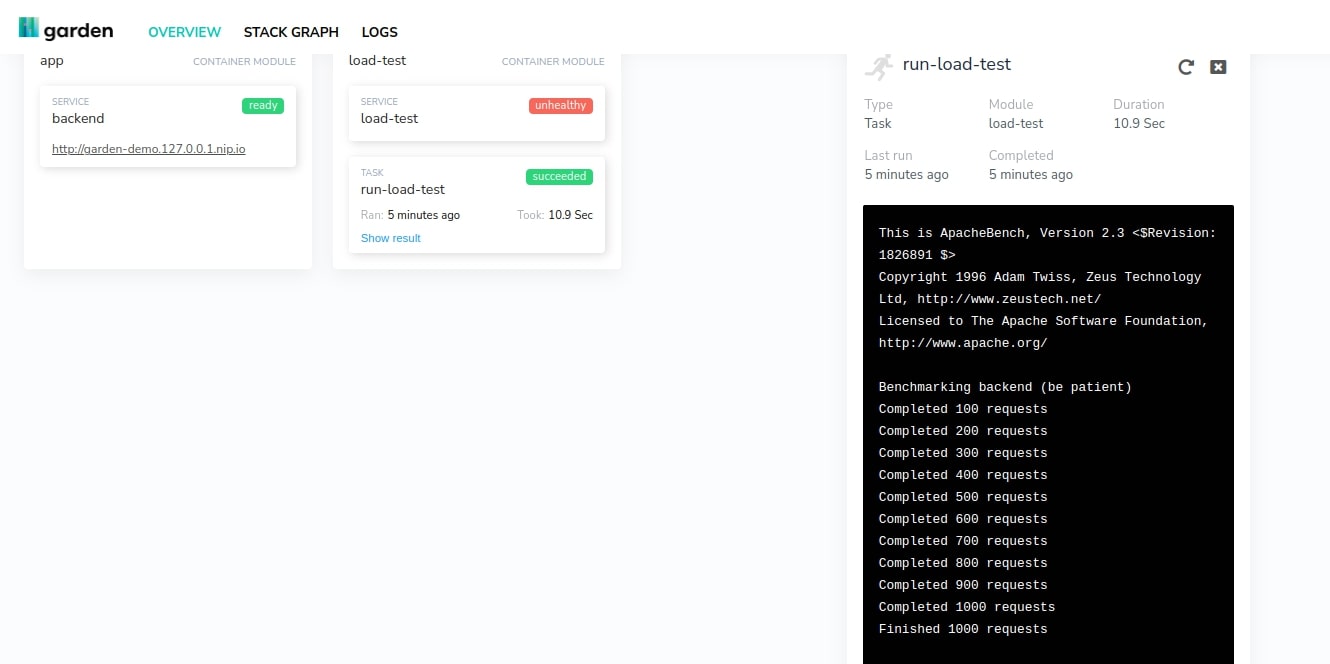
As you can see from the **LOGS** section of the Garden dashboard, Apache Bench ran your load test successfully, simulating 1,000 web requests to the Node.js server:
The container module looks unhealthy because the container exited once the <span class="p-color-bg">ab</span> command finished.
You may notice that the load testing tool only gets built and deployed once the Kubernetes app has been deployed successfully. Click on **STACK GRAPH** to verify this:
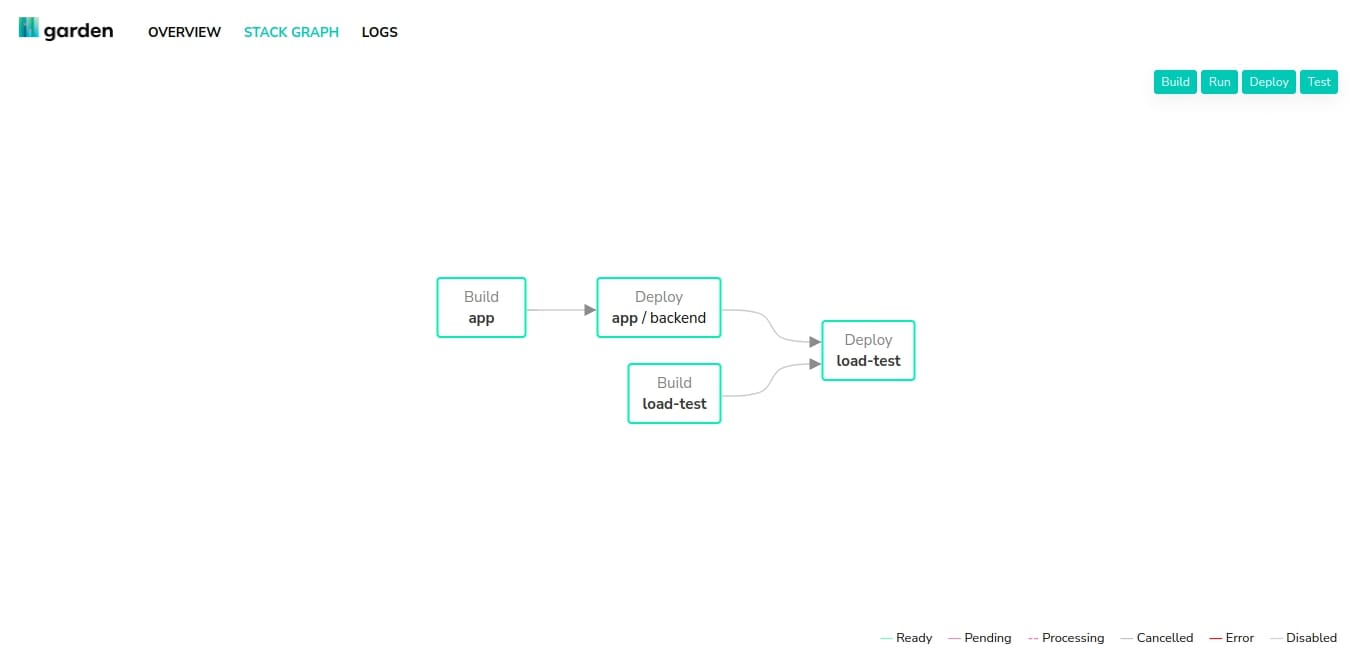
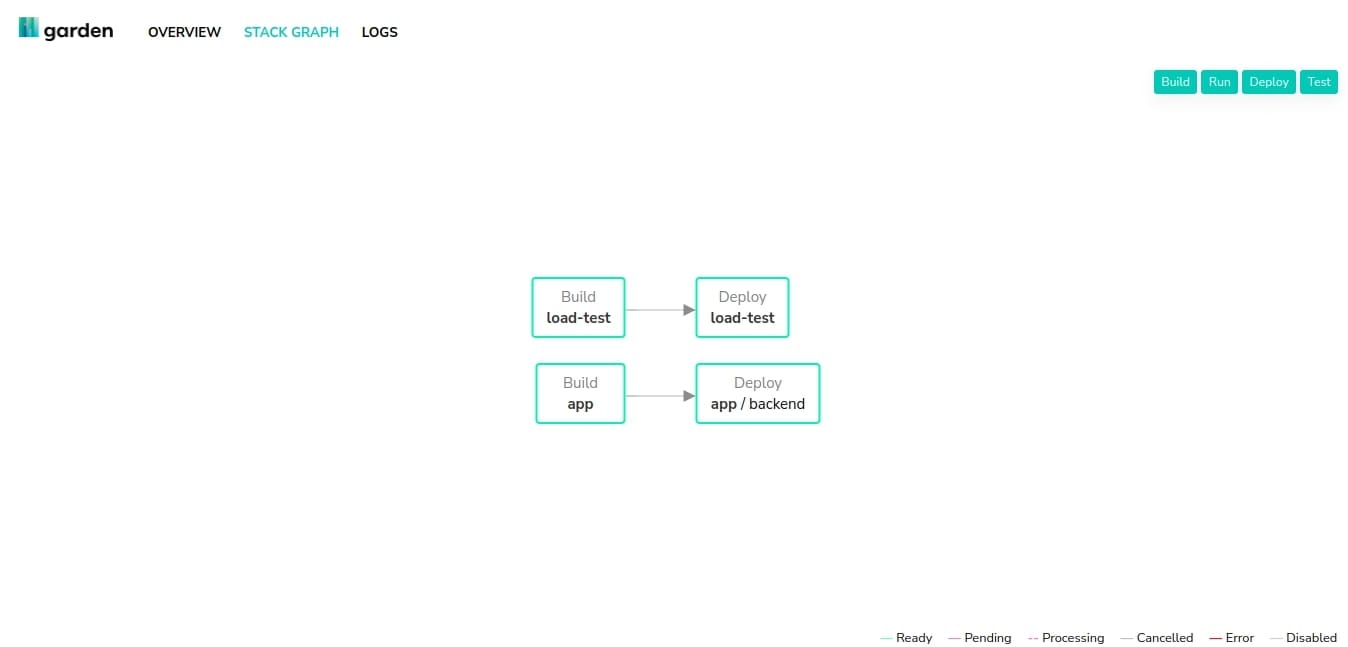
Here, you've used the dependencies key of the <span class="p-color-bg">load-test</span> service to define this behavior. However, you may want to keep the <span class="p-color-bg">load-test/garden.yml</span> service independent of the <span class="p-color-bg">app/backend</span> service when developing locally so that Garden can start the deployment of the load test service without waiting for the application to be built. To do this, the following <span class="p-color-bg">load-test/garden.yml</span> definition removes the dependencies field:
If you run <span class="p-color-bg">garden deploy</span> now and go to **STACK GRAPH**, you can see that both the <span class="p-color-bg">app/backend</span> and <span class="p-color-bg">load-test</span> services are independent:
You can find all the code snippets and configuration files used in this tutorial in this GitHub repository.
If you want to run the performance test manually, you can define a Garden task in your load-test module. Edit your <span class="p-color-bg">load-test/garden.yml</span> definition and fill it with the following:
Save and close this file. Then, run the <span class="p-color-bg">load-test</span> task with the following command:
If you go to the Garden dashboard, you should see this new task under the **load-test** module. Click on it to see if it ran successfully
Now that you've manually set up a Garden task that runs your <span class="p-color-bg">load-test</span>, let's create a Garden workflow to control its execution. Using Garden Enterprise, you can define your workflows to trigger automatically from PRs or branches:
Save this file as <span class="p-color-bg">workflows.garden.yml</span> in your Garden project's root. You can run the workflow manually using the following:
Conclusion
Continuous performance testing is essential to ensure your app can perform under heavy pressure. In this article, we've talked about continuous performance testing and the challenges associated with implementing it in complex Kubernetes environments.
Garden is a modern-day automation tool for Kubernetes that lets you build robust CPT models for your Kubernetes applications. In addition, you can migrate existing Kubernetes resources to Garden, allowing you to use the same configuration and workflows at every step of the development process.
Written by Rubaiat Hossain
Rubaiat is a CS grad with a strong passion for open-source. Apart from being a Unix veteran, he's also into network security, cryptography, and functional programming. He's an avid collector of secondhand books and has a never-ending admiration for classic rock.